

新年伊始,将个人网站从 dumi 迁移到了 docusaurus。
背景
过去一年多的时间,我都在用 dumi 构建自己的前端知识体系文档,期间升级过很多次 dumi 的版本,也看着 dumi 从 200 多 star 逐渐增长到 2k 多 star。
过去选择 dumi,主要看中的是 dumi 对于在线文档的交互能力,因为有时候学习一个新的知识点总想着用 demo 的方式去实现,尤其是 CSS 这种的。而 dumi 提供的交互能力恰好可以满足我的这一个需求。同时配合 Typora 编写 markdown 文档十分的方便。
不过同时我也注意到了 docusaurus (这个取自document和saurus组合词的名称真的太难记了)这个文档生成工具,不过一年前这个工具还比较稚嫩,提供的能力不太全面,所以就放弃了。不过随着越来越多的网站开始使用 docusaurus,我也开始了迁移之路。
迁移步骤
docusaurus 提供脚手架工具直接生成站点项目代码,这里直接利用脚手架来创建。
npx create-docusaurus@latest my-website classic --typescript
生成的项目目录如下:
my-website
├── blog
│   ├── 2019-05-28-hola.md
│   ├── 2019-05-29-hello-world.md
│   └── 2020-05-30-welcome.md
├── docs
│   ├── doc1.md
│   ├── doc2.md
│   ├── doc3.md
│   └── mdx.md
├── src
│   ├── css
│   │   └── custom.css
│   └── pages
│       ├── styles.module.css
│       └── index.js
├── static
│   └── img
├── docusaurus.config.js
├── package.json
├── README.md
├── sidebars.js
└── yarn.lock
插件和预设能力
docusaurus 提供插件和预设的配置,类似于 babel,webpack 这些工具的能力,使用 CLI 指定@docusaurus/preset-classic预设会同时包含至关重要的三个插件:
@docusaurus/plugin-content-docs:提供文档编写能力,对应生成的docs目录@docusaurus/plugin-content-blog:提供博客渲染能力,对应生成的blog目录@docusaurus/plugin-content-pages:提供普通前端页面的渲染能力,对应生成的pages目录
这三种插件的配置都在docusaurus.config.js这个文件下,对于我个人需求来说这三种能力都需要,因此我都开启了,如果不需要的话,直接在presets.docs|blog|pages设置成false即可。
修改主页指向
我希望将个人博客页面作为站点主页,那么需要在docusaurus.config.js将blog对应的routeBasePath设置成/,同时指定博客文档所在的目录path;这样其他在docs或者pages就是相对于blog的路由路径。
// docusaurus.config.js

module.exports = {
  presets: [
    "classic",
    {
      blog: {
        // blog作为主页
        routeBasePath: "/",
        path: "./blog",
        ...
      },
      pages: {
        path: "src/pages",
        // 指定 pages 的路由路径,因为 blog 作为主页了
        routeBasePath: "/pages",
        ...
      }
    }
  ]
}
顶部导航栏配置
顶栏无非就是 Logo,导航栏这些,对应 docusaurus 提供的主题配置项的navbar。
| 配置项 | 类型 | 默认值 | 描述 |
|---|---|---|---|
title | string | undefined | 顶部标题 |
logo | object | undefined | 顶部 logo |
items | NavbarItem[] | [] | 顶部菜单导航 |
hideOnScroll | boolean | false | 是否在页面向下滚动时自动隐藏导航栏 |
style | `'primary' | 'dark'` |
导航菜单通过items配置,docusaurus 提供 5 种菜单配置类型:
type="link":默认形式,配置to或者href指定菜单点击跳转路由;type="dropdown":下拉菜单导航

type="docsVersionDropdown":文档版本下拉菜单type="localeDropdown":文档多国语选择下拉菜单type="search":搜索框,需要配置搜索引擎才可用
同时顶部默认是提供网站夜间和白天主题的切换按钮。
我觉得唯一的不足就是不支持自定义菜单项的icon,例如需要显示 GitHub 链接,需要自己在src/custom.css里进行样式覆盖:
{
  href: "https://github.com/wood3n/icodex",
  position: "right",
  // custom logo in custom.css
  className: "header-github-link",
 "aria-label": "GitHub repository",
}
/* GitHub Link */
.header-github-link:hover {
  opacity: 0.6;
}

.header-github-link:before {
  content: "";
  width: 24px;
  height: 24px;
  display: flex;
  background: url("data:image/svg+xml,%3Csvg viewBox='0 0 24 24' xmlns='http://www.w3.org/2000/svg'%3E%3Cpath d='M12 .297c-6.63 0-12 5.373-12 12 0 5.303 3.438 9.8 8.205 11.385.6.113.82-.258.82-.577 0-.285-.01-1.04-.015-2.04-3.338.724-4.042-1.61-4.042-1.61C4.422 18.07 3.633 17.7 3.633 17.7c-1.087-.744.084-.729.084-.729 1.205.084 1.838 1.236 1.838 1.236 1.07 1.835 2.809 1.305 3.495.998.108-.776.417-1.305.76-1.605-2.665-.3-5.466-1.332-5.466-5.93 0-1.31.465-2.38 1.235-3.22-.135-.303-.54-1.523.105-3.176 0 0 1.005-.322 3.3 1.23.96-.267 1.98-.399 3-.405 1.02.006 2.04.138 3 .405 2.28-1.552 3.285-1.23 3.285-1.23.645 1.653.24 2.873.12 3.176.765.84 1.23 1.91 1.23 3.22 0 4.61-2.805 5.625-5.475 5.92.42.36.81 1.096.81 2.22 0 1.606-.015 2.896-.015 3.286 0 .315.21.69.825.57C20.565 22.092 24 17.592 24 12.297c0-6.627-5.373-12-12-12'/%3E%3C/svg%3E")
    no-repeat;
}

html[data-theme="dark"] .header-github-link:before {
  background: url("data:image/svg+xml,%3Csvg viewBox='0 0 24 24' xmlns='http://www.w3.org/2000/svg'%3E%3Cpath fill='white' d='M12 .297c-6.63 0-12 5.373-12 12 0 5.303 3.438 9.8 8.205 11.385.6.113.82-.258.82-.577 0-.285-.01-1.04-.015-2.04-3.338.724-4.042-1.61-4.042-1.61C4.422 18.07 3.633 17.7 3.633 17.7c-1.087-.744.084-.729.084-.729 1.205.084 1.838 1.236 1.838 1.236 1.07 1.835 2.809 1.305 3.495.998.108-.776.417-1.305.76-1.605-2.665-.3-5.466-1.332-5.466-5.93 0-1.31.465-2.38 1.235-3.22-.135-.303-.54-1.523.105-3.176 0 0 1.005-.322 3.3 1.23.96-.267 1.98-.399 3-.405 1.02.006 2.04.138 3 .405 2.28-1.552 3.285-1.23 3.285-1.23.645 1.653.24 2.873.12 3.176.765.84 1.23 1.91 1.23 3.22 0 4.61-2.805 5.625-5.475 5.92.42.36.81 1.096.81 2.22 0 1.606-.015 2.896-.015 3.286 0 .315.21.69.825.57C20.565 22.092 24 17.592 24 12.297c0-6.627-5.373-12-12-12'/%3E%3C/svg%3E")
    no-repeat;
}
文档侧栏菜单配置
docusaurus默认是会渲染在blog文件夹下的.md或者.mdx文件,对于src/pages目录的任何文件都会渲染成页面,而对于docs目录的 markdown 文件可以通过sidebarPath来配置生成不同的侧边菜单栏。
如果使用脚手架创建文档站点,ducusaurus 会默认生成一个sidebars.js文件,包含下面这个默认配置项:
module.exports = {
  mySidebar: [
    {
      type: 'autogenerated',
      dirName: '.'
    },
  ],
};
默认情况下,在docs目录的 markdown 文件会全部显示出来,不会自动归类,而我的需求是能够根据我在 docs目录下创建的文件夹进行分类,并自动生成每篇文档的路由地址。来看一下 docusaurus 提供的能力 —— Sidebar | Docusaurus,对于侧边栏生成的类型有以下几种:
type="doc":配合id指定单个文档的标题和链接type="link":配合href指定任意跳转链接type="category":配合items指定分类包含的文档type="autogenerated":配合dirName自动生成侧边栏
看起来type="category"可以满足我的需求,但是每篇文章写完我都要配置一下侧边栏这也太麻烦了,于是我尝试了下type="autogenerated"这个自动生成的,dirname配置成在docs下创建的目录名称就可以自动对该目录下文档进行分类,再配合顶部导航栏的docId指向每个文档分类下的第一篇文章,点击以后就会自动打开不同目录下归类的文档列表。
// sidebars.js
const sidebars = {
  javascript: [
    {
      type: "autogenerated",
      dirName: "javascript",
    },
  ],
  typescript: [
    {
      type: "autogenerated",
      dirName: "typescript",
    },
  ],
  css: [
    {
      type: "autogenerated",
      dirName: "css",
    },
  ]
}
// docusaurus.config.js
module.exports = {
  themeConfig: {
    navbar: {
      items: [
        {
          type: "dropdown",
          label: "Skill",
          position: "right",
          items: [
            {
              type: "doc",
              label: "JavaScript",
              docId: "javascript/类型/类型定义",
            }
            ...
          ]
        }
      ]
    }
  }
}
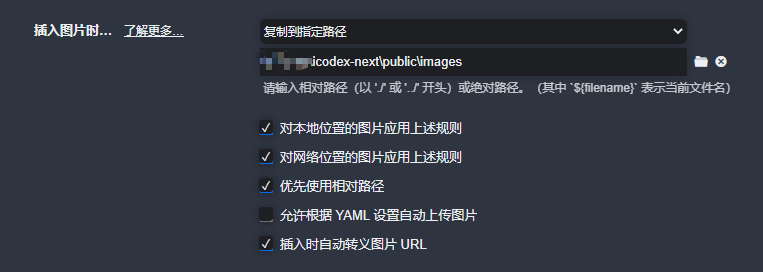
图片目录
对于图片的处理,我这边没有选择图床,直接复制到指定目录下,docusaurus 提供staticDirectories配置项用于指定静态资源目录,默认是static文件夹,对于static文件夹的文件,全部都会在构建以后复制到网站根目录下。
而对于staticDirectories没有包含的文件目录,包括 markdown 中引用的图片文件等,都会在构建后复制到网站根目录的assets目录下(图片的话就是assets/images),并且会对路径自动进行转换。利用这个能力,我在网站代码根目录下创建了public/images目录用于保存所有在 markdown 页面包含的图片,配合 Typora 复制图片并转换图片相对路径的能力,就可以做到在任何地方打开 markdown 都能正常显示图片。
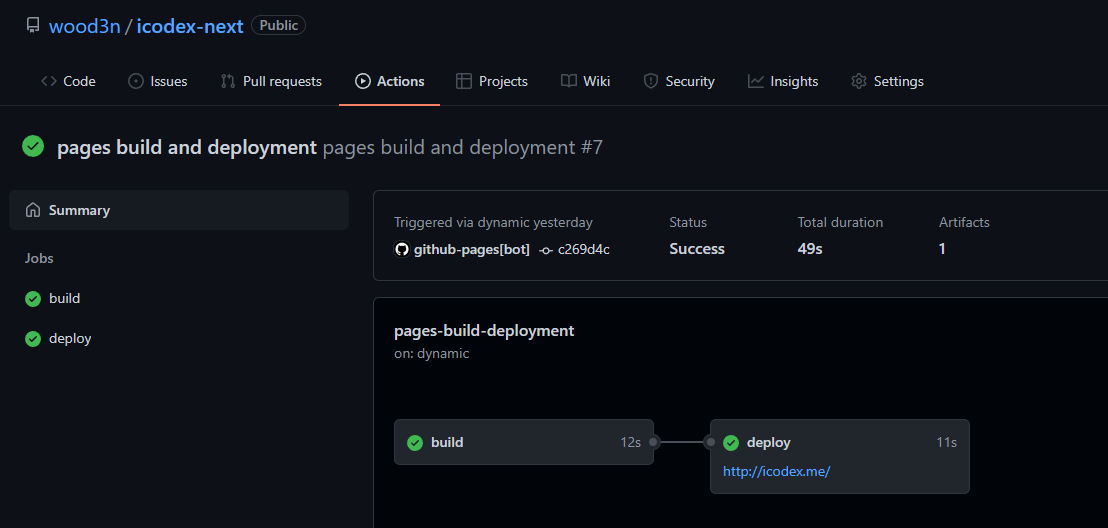
网站部署
网站部署不用多说了,依旧白嫖 GitHub Pages,docusaurus 也提供了集成 GitHub Actions 自动部署的配置参考 —— Deployment | Docusaurus:
name: Deploy to GitHub Pages

on:
  push:
    branches: [main]
    paths: [website/**]

jobs:
  deploy:
    name: Deploy to GitHub Pages
    runs-on: ubuntu-latest
    steps:
      - uses: actions/checkout@v2
      - uses: actions/setup-node@v2
        with:
          node-version: 14.x
          cache: yarn
      - name: Build website
        run: |
          yarn install --frozen-lockfile
          yarn build

      # Popular action to deploy to GitHub Pages:
      # Docs: https://github.com/peaceiris/actions-gh-pages#%EF%B8%8F-docusaurus
      - name: Deploy to GitHub Pages
        uses: peaceiris/actions-gh-pages@v3
        with:
          github_token: ${{ secrets.GITHUB_TOKEN }}
          # Build output to publish to the `gh-pages` branch:
          publish_dir: ./build
这样在使用 Typora 写完文档或者博客以后,直接push到 GitHub 仓库,触发 GitHub Actions 完成自动构建打包和部署,一气呵成,妈妈再也不用担心我写博客时候手忙脚乱的部署了。
网站全局搜索
docusaurus 优先提供支持 Algolia 的能力,使用起来也很简单,分为三步: