webpack脚手架搭建(1)
Scaffold 简介
当使用react-create-app命令行工具的时候能够轻松地创建 React 基础应用,其背后就是利用webpack提供的能力编写的脚手架。cra虽然一定程序上可以满足小型项目的需求,但是由于其封装限制(需要eject才能暴露配置)以及内部一些冗余的配置,导致其并不能完全适应大型项目的要求,因此理论上具有前端开发岗位的公司都应该自行定制自己的脚手架以适应业务的需求,例如自动配置react-router,启用less等这些拓展功能。
yeoman
yeoman,约曼是一个脚手架编写服务,包括但不仅限于react,angular应用,包括但不仅限于 JS 语言,其建立在以下三种工具的基础之上:
yo:yeoman命令行工具,用于使用脚手架模板(generators)创建项目gulp/grunt:gulp等应用构建工具npm:yo以及脚手架需要的模板工具都必须由npm包管理系统来提供
使用 generator
在yeoman中,脚手架就是generator,其本身提供许多第三方的generators可以随意使用,第三方的generators全部使用generator-*的形式来命名,例如使用generator-webapp:
- 全局安装
yo和generator-webapp
yarn global add yo

yarn global add generator-webapp
- 使用
yo运行generator-webapp
yo webapp
编写 generator
安装 generator-generator
yeoman本身提供自定义脚手架的辅助工具 —— generator-generator
yarn global add yo

yarn global add generator-generator
首先全局安装generator-generator,然后在指定目录执行yo generator,即可生成编写generator的项目结构
.
├── generators/
│   └── app/
│       ├── index.js
│       └── templates/
│           └── dummyfile.txt
├── .editorconfig
├── .eslintignore
├── .gitattributes
├── .gitignore
├── .travis.yml
├── .yo-rc.json
├── LICENSE
├── README.md
├── package.json
└── __tests__/
    └── app.js
Generator 基类
yeoman提供一个基类Generator,自定义的generator都需要extends该基类,例如:
const Generator = require('yeoman-generator');

module.exports = class extends Generator {
  method1() {
    console.log('hey 1');
  }
};
运行 generator
由于是本地开发的generator程序,不能直接作为全局npm模块运行,但是可以通过在generator项目根目录执行npm link或者yarn link来链接执行本地模块,接下来会自动安装项目依赖并执行generator程序。
cd generator

yarn link
当运行generator以后,yeoman会在generator内部查找.yo-rc.json文件,并把.yo-rc.json所在的目录作为generator的根目录,从generators/app目录下查找index.js文件并执行,如果和app有同级目录,则可以使用yo <generator-name>:<sub directory-name>执行其中的子程序。
yeoman-run loop
回到class的原理上来说,在class内部定义的普通方法都会被绑定到父类的prototype上,由于generator继承自Generator基类,所以其内部普通函数都定义在Generator.prototype上,它们会自动运行。
普通函数会自动运行但不是按顺序执行,它们会有对应的执行队列,队列通常按照以下顺序执行:
initializing:获取generator的初始配置prompting:执行this.prompt()configuring:保存配置,例如写入.editorconfig等配置文件default:当方法名没有匹配到优先级的时候,会进入这个队列writing:写入本地文件的操作conflicts:处理冲突,内部使用,编写generator的时候一般用不到install:执行脚手架安装依赖程序,例如yarnInstallend:generator运行结束前最后执行
一般来说,经常用到的就是prompting,default,writing和install阶段
yeoman-API
交互
yeoman提供一系列用户交互方面的 API 如下
this.log
this.log(string)
在脚手架程序中禁止使用console.log()以及process.stdout.write()语句,而应该使用yeoman内置的this.log()程序来打印文本信息,this表示当前generator的执行上下文。
this.prompt
this.prompt(questions) => promise<answers>
yeoman内置Inquirer.js提供的prompt方法,它是一个异步方法,返回Promise类型的结果,提供基于 nodejs 的用户交互接口
const inquirer = require('inquirer');

inquirer
  .prompt(questions)
  .then(answers => {
    // Use user feedback for... whatever!!
  })
  .catch(error => {
    if (error.isTtyError) {
      // Prompt couldn't be rendered in the current environment
    } else {
      // Something else went wrong
    }
  });
questions是一个对象数组类型,包含一连串问题,会按顺序提问。每个问题都可以由以下属性组成:
| 属性 | 类型 | 默认值 | 解释 |
|---|---|---|---|
type | string | input | input:问题要求输入number:要求输入数字,非数字得到的答案将会是nullconfirm:输入确认,Y/nlist:选择项,必须同时提供choices属性rawlist:带有编号的选择项,必须同时提供choices属性expand:也是选项,提供编号以及更复杂的选项内容checkbox:多选框,一般来说按空格键是选择password:密码输入,注意一般同时设置mask: '*',否则看不见输入的字符editor:打开选择的编辑器进行输入 |
name | string | 储存答案对应的属性 | |
message | string | function | 和name一样 |
default | `string | number | boolean |
choices | `array | function` | |
validate | (input) => boolean | 验证答案的函数,接收用户输入参数,返回true表示通过验证,不通过可以返回一个错误提示的字符串 | |
filter | (input) => value | 过滤用户输入 | |
transformer | (input) => display value | 将用户输入进行转换,返回的值是最终展示给用户的 | |
when | boolean | (answers)=>boolean | |
pageSize | number | 更改使用 list,rawList,expand 或 checkbox 时将呈现的行数 | |
store | boolean | false | yeoman拓展的属性,用于储存用户历史输入信息,可用于下一次运行generator的默认值 |
answers也就是用户输入的所有问题的答案,各个属性名称和question.name的值一样,属性值类型取决于question.type:
confirm:则返回true或者falseinput|editor|password:返回字符串number:返回数字,如果输入的内容不能转换成number类型,则返回nulllist|rawlist|expand:返回用户选择的选项字符串checkbox:返回多选的字符串数组
在generator内部可以通过this.answers来获取所有答案
const Generator = require('yeoman-generator');

module.exports = class extends Generator {
  async prompting() {
    const answers = await this.prompt([
      {
        type: 'input',
        name: 'name',
        message: 'Your project name',
        default: this.appname, // Default to current folder name
      },
      {
        type: 'confirm',
        name: 'cool',
        message: 'Would you like to enable the Cool feature?',
      },
    ]);

    this.log('app name', answers.name);
    this.log('cool feature', answers.cool);
  }

  writing() {
    this.log('cool feature', this.answers.input); // user answer `cool` used
  }
};
this.argument
在执行某个generator命令的后面跟随的参数被称为argument,例如执行yarn create react-app的时候后面需要跟上项目名称,用来初始化项目文件夹
yarn create react-app <project-directory>
这些传递的参数可以通过this.argument限定其格式,该方法必须在constructor中使用,其接受两个参数:
this.argument(name, [options])
name:也就是获取该参数值的键,可以通过this.options[name]获取用户输入的参数值<options>:可以指定以下属性来限制参数的格式type:参数类型,String,Number,Array,注意大写开头的格式required:是否必须default:默认值desc:参数的描述信息
对于用户输入的参数,可以在generator内部通过this.options[name]来获取。
module.exports = class extends Generator {
  constructor(args, opts) {
    super(args, opts);

    this.argument("appname", {
      type: String,
      required: true,
      default: 'myproj',
      desc: 'some description'
    });

    this.log(this.options.appname);
  }
};

// 执行generator,后面带的参数值就是指定的appname对应获取的值
yo my-generator my-project
this.option
option有点类似于augument,不同的是option的输入必须采用--分隔的形式,这种通常是命令的含义而不是参数,例如--babel是指定babel作为编译器。
对于option的指定通过this.option方法,该方法同样接收两个参数:
name:获取输入值的键名<options>:一系列限制属性type:类型,String,Number,Booleandefault:默认值alias:简短的别名desc:描述信息hide:是否在帮助信息中显示
对于用户输入的信息,在generator内部通过this.options[name]来获取。
module.exports = class extends Generator {
  constructor(args, opts) {
    super(args, opts);

    this.option("coffee", {
      type: String,
      default: 'myproj',
      desc: 'some description'
    });

    this.scriptSuffix = this.options.coffee ? ".coffee" : ".js";
  }
};

// 执行generator
yo my-generator --coffee
依赖管理
yeoman内置npm,yarn等依赖安装的方法:
this.npmInstall():在运行时通过npm安装依赖this.yarnInstall():在运行时通过yarn安装依赖this.installDependencies():默认执行npm或者bower安装依赖,但是可以通过设置参数来控制包管理器
this.installDependencies({
  npm: true,
  bower: false,
  yarn: true,
});
this.fs.readJSON():使用该方法可以读取模板文件中package.json的配置this.fs.extendJSON():可以补充拓展package.json的配置
文件写入
脚手架的一个核心功能是直接生成本地项目文件结构,所以具有文件系统的交互能力是必须的!
脚手架内部的文件上下文有两个:
generator内部模板文件的目录路径,默认是./templates/- 使用
generator搭建项目的目录路径
this.fs
yeoman的文件读写建立在mem-fs-editor基础上,yeoman提供this.fs对象,其暴露了所有mem-fs-editor 支持的 API。
this.fs.read(filepath, [options]):读取文件并返回字符串this.fs.readJSON(filepath, [defaults]):读取文件并返回 JSON,defaults表示当目标路径的文件找不到或者读取出错时返回的内容this.fs.write(filepath, contents):写入文件内容,不存在则创建文件,存在则替换文件内容this.fs.writeJSON(filepath, contents[, replacer [, space]]):使用 JSON 写入文件内容,replacer和space是JSON.stringify()方法的参数,replacer函数用于处理序列话的过程,space是 JSON 缩进空格,默认为2this.fs.append(filepath, contents, [options]):向指定文件添加内容this.fs.extendJSON(filepath, contents[, replacer [, space]]):拓展 JSON 文件的内容this.fs.delete(filepath, [options]):删除文件this.fs.copy(from, to, [options], context[, templateOptions ]):将一个文件从from路径拷贝到to指定的路径this.fs.copyTpl(from, to, context[, templateOptions [, copyOptions]]):将一个ejs模板文件从from路径拷贝到to指定的路径this.fs.move(from, to, [options]):移动或者重命名文件this.fs.commit([filters,] [stream,] callback):将文件操作持久化保存到硬盘上,这个操作在yeoman中已经自动完成,所以这个方法不需要了
在yeoman中使用示例:
class extends Generator {
  async prompting() {
    this.answers = await this.prompt([{
      type    : 'input',
      name    : 'title',
      message : 'Your project title',
    }]);
  }

  writing() {
    this.fs.copyTpl(
      this.templatePath('index.html'),
      this.destinationPath('public/index.html'),
      { title: this.answers.title } // user answer `title` used
    );
  }
}
this.templatePath
模板文件的目录路径,默认是./templates/,可以使用this.sourceRoot()访问,对于具体的模板文件可以使用this.templatePath(<file_path>)来访问。
this.destinationPath
运行generator创建项目的文件根目录,可以使用this.destinationRoot()访问,对于目录下的文件可以使用this.destinationPath(<file_path>)访问。
注意,如果要修改安装依赖的目标路径,可以通过this.destinationRoot()在最后的install阶段来修改:
install() {
  this.destinationRoot(this.options.appname);
}
辅助工具
chalk
chalk(粉笔)是一个开源的调整控制台输出文本样式的工具,在generator内部使用可以让项目输出的信息更有意思。
const chalk = require('chalk');

const error = chalk.bold.red;
const warning = chalk.keyword('orange');

console.log(error('Error!'));
console.log(warning('Warning!'));

cowsay
cowsay,也是一个很有意思的开源工具,能在控制台打印出来一头说话的牛。
const cowsay = require('cowsay');

console.log(
  cowsay.say({
    text: 'moo………………………',
    e: 'oO',
    T: 'U ',
  }),
);

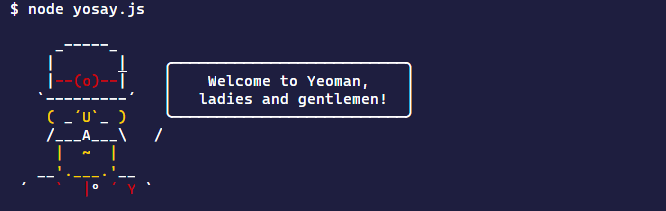
yosay
yosay是yeoman开源的另一个小工具,和cowsay差不多,它输出的是yeoman的 logo,还自带彩色。
const yosay = require('yosay');

console.log(yosay());