什么是 context
什么是 context
在webpack中有基础目录context的配置项,webpack默认使用webpack.config.js所在的目录,也就是webpack执行的路径。
webpack构建的时候会使用context作为entry和loader的根目录,然后去解析import、import(),require的模块,最后一个模块依赖关系图。
例如对于下面的目录结构:
├─ public
│ ├─ favicon.ico
│ └─ index.html
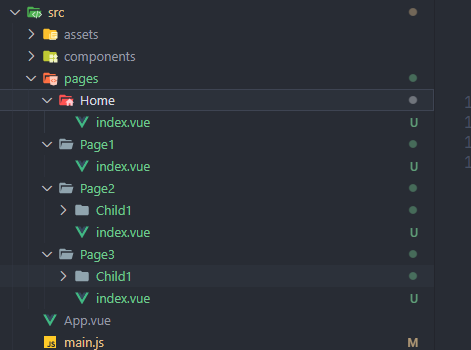
├─ src
│ ├─ App.vue
│ ├─ assets
│ │ └─ logo.png
│ ├─ components
│ │ └─ HelloWorld.vue
│ ├─ main.js
│ └─ pages
│ ├─ Home
│ ├─ Page1
│ ├─ Page2
│ └─ Page3
└─ package.json
├─ webpack.config.js
webpack默认使用当前所在的目录作为基础目录,但是如果指定的context为src,那么extry就是相对于src的。
const path = require('path');

module.exports = {
  //...
  context: path.resolve(__dirname, 'src'),
  entry: './main.js',
};
什么是 require.context
require.context是webpack提供的可以在运行时解析指定的context上下文的函数。通过安装@types/webpack-env查看其类型定义如下:
interface RequireContext {
keys(): string[];
(id: string): any;
	<T>(id: string): T;
	resolve(id: string): string;
/** The module id of the context module. This may be useful for module.hot.accept. */
id: string;
}

function requireContext(
	path: string,
deep?: boolean,
filter?: RegExp,
mode?: "sync" | "eager" | "weak" | "lazy" | "lazy-once
): RequireContext;
require.context接收三个参数:
context:指定的解析根目录路径;deep:是否递归解析子目录的文件;filter:要匹配的文件路径模式,例如.vue、.jsx等mode:这里提供几种模式和webpack解析import()语句指定的模式一样sync:默认值,同步解析模块文件并直接打包在一起;lazy:require.context将返回一个 Promise 对象,且每个导入的模块分别构建成单个 chunk 文件,以便按需加载;lazy-once:将所有导入的模块都打包到一个 chunk 文件,此 chunk 将在第一次import()时调用时获取,随后的import()则使用相同的网络响应。即只需加载一次,后续关联模块都直接读取;eager:返回 Promise,不会生成额外的 chunk。所有的模块都被当前的 chunk 引入,并且没有额外的网络请求;与静态导入相比,在调用import()完成之前,该模块不会被执行。weak:首先尝试加载模块,如果该模块函数已经以其他方式加载(即另一个 chunk 导入过此模块,或包含模块的脚本被加载)。会返回 Promise,但是只有在客户端上已经有该 chunk 时才会成功解析,如果该模块不可用,则返回 rejected 状态的Promise,且网络请求永远都不会执行。
require.context返回一个函数,这个函数接收一个模块路径id作为参数,就相当于require(id)方法,可用于加载模块文件,并且函数附加了两个方法:
keys():解析context下匹配的所有模块相对于context的路径,可以作为id传入require.context返回的函数resolve():返回模块解析的完整路径
实践
下面结合vue-router/v3版本来使用require.context自动从配置的模块路径导入模块文件。
配置环境目录
我的目标是希望解析src/pages下的所有模块
查看 require.context 返回了什么
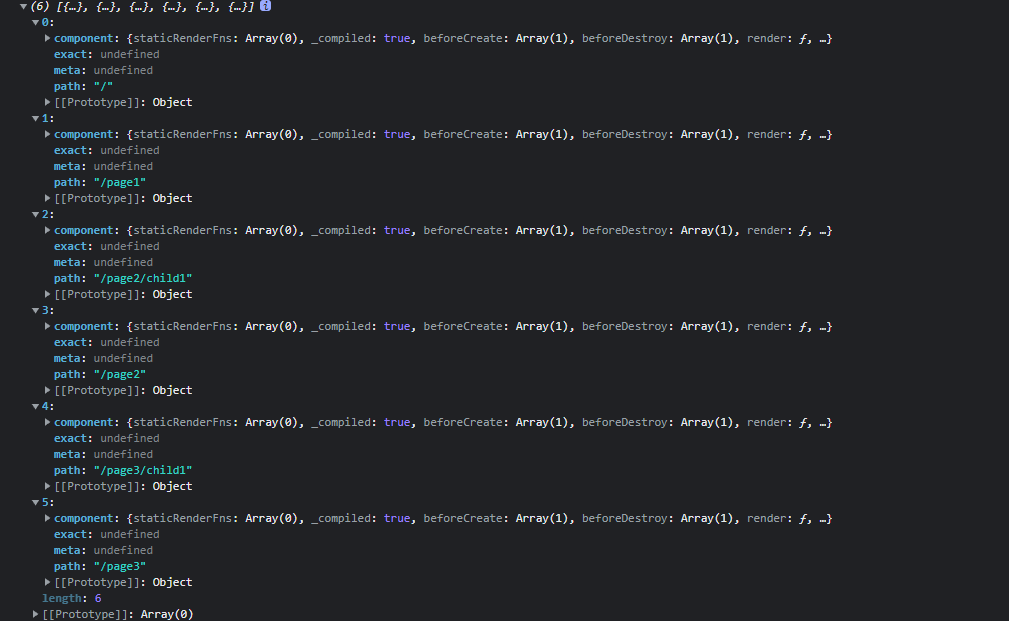
通过在vue入口文件中执行下面一段函数可以得到require.context的结果为下面所示
function resolveContext() {
  const webpackRequire = require.context('../src/pages', true, /.vue/);
  console.log(webpackRequire);
  console.log(webpackRequire.keys());
  webpackRequire.keys().forEach(item => {
    console.log(item);
  });
}
require.context返回的就是下面的编译后的webpackContext函数,可以看出该函数解析相对于context的所有vue文件模块并建立模块路径映射关系,并通过__webpack_require__加载指定id的模块并返回。
resolve返回模块的完整路径。
var map = {
  './Home/index.vue': './src/pages/Home/index.vue',
  './Page1/index.vue': './src/pages/Page1/index.vue',
  './Page2/Child1/index.vue': './src/pages/Page2/Child1/index.vue',
  './Page2/index.vue': './src/pages/Page2/index.vue',
  './Page3/Child1/index.vue': './src/pages/Page3/Child1/index.vue',
  './Page3/index.vue': './src/pages/Page3/index.vue',
};

function webpackContext(req) {
  var id = webpackContextResolve(req);
  return __webpack_require__(id);
}
function webpackContextResolve(req) {
  if (!__webpack_require__.o(map, req)) {
    var e = new Error("Cannot find module '" + req + "'");
    e.code = 'MODULE_NOT_FOUND';
    throw e;
  }
  return map[req];
}
webpackContext.keys = function webpackContextKeys() {
  return Object.keys(map);
};
webpackContext.resolve = webpackContextResolve;
module.exports = webpackContext;
webpackContext.id = './src/pages sync recursive .vue';
生成 routes
通过了解require.context自动加载模块的机制,下面我们来自动生成vue-router需要的routes配置
首先项目配置的routes文件如下:
export default [
  {
    title: '主页',
    icon: 'xxxx',
    path: '/',
    component: './pages/Home',
  },
  {
    title: '页面一',
    path: '/page1',
    component: './pages/Page1',
  },
  {
    title: '页面二',
    path: '/page2',
    component: './pages/Page2',
    children: [
      {
        title: '页面二-Child1',
        path: '/page2/child1',
        component: './pages/Page2/Child1',
      },
    ],
  },
  {
    title: '页面三',
    path: '/page3',
    component: './pages/Page3',
    children: [
      {
        name: '页面二-Child1',
        path: '/page3/child1',
        component: './pages/Page3/Child1',
      },
    ],
  },
];
component就对应模块路径,对这个配置的routes数组进行递归解析,然后通过require.context加载指定模块
这里需要注意的一个点是
vue-router的children配置是会被渲染在上层路由组件内部,所以这里不采用children
/**
 * 格式化路由配置,生成vue-router的routes配置项
 * @param {Array} routes
 * @returns
 */
export function formatRoute(routesCfg) {
  return routesCfg.reduce(
    (result, { meta, path, exact, component, children }) => {
      if (path && component) {
        const route = {
          exact,
          path,
          component: webpackRequire(component),
          meta,
        };

        // 子路由
        if (children) {
          result.push(...formatRoute(children));
        }

        result.push(route);
      }

      return result;
    },
    [],
  );
}

/**
 * 加载模块
 * @param {string} id 模块路径
 * @returns 模块
 */
function webpackRequire(id) {
  // vue-router的配置项
  const webpackRequire = require.context('../src', true, /.vue/);
  let moduleId = id;
  // 没有指定文件后缀,默认串接 index.vue
  if (!/.vue/.test(moduleId)) {
    moduleId = `${moduleId}/index.vue`;
  }

  return webpackRequire(moduleId).default;
}
最终效果见 —— [wood3n/vue-router: make vue-router automaticly (github.com)](